Views: 74Download FLIR Firmware and Software, Teledyne FLIR designs, develops, manufactures, markets, and distributes technologies that enhance perception and awareness. We bring...
REKLAM
Views: 74
Download FLIR Firmware and Software, Teledyne FLIR designs, develops, manufactures, markets, and distributes technologies that enhance perception and awareness. We bring innovative sensing solutions into daily life through our thermal imaging, visible-light imaging, video analytics, measurement and diagnostic, and advanced threat detection systems.
REKLAM
Teledyne FLIR offers a diversified portfolio that serves a number of applications in government & defense, industrial, and commercial markets. Our products help first responders and military personnel protect and save lives, promote efficiency within the trades, and innovate consumer-facing technologies. Teledyne FLIR strives to strengthen public safety and well-being, increase energy and time efficiency, and contribute to healthy and intelligent communities.
Each available procedure will include detailed steps necessary to update the firmware on FLIR Cx, Ex, Exx/Exx-EST, T4xx, T6xx, T5xx/T5xx-EST, T8xx and T10xx series cameras.
General firmware update instructions can be found here
Using FLIR Tools / Tools+
For customers that use Tools / Tools+ Desktop Software to update firmware, please follow these simple instructions. Please note, FLIR Tools / Tools+ is in the process of being discontinued. For more information you can find the Discontinuation FAQ here.
Power up the camera, connect it to the PC with a USB cable, and then start FLIR Tools. If your camera uses an SD card, ensure that the card is inserted into the camera.
If the splash screen appears, click Check for Updates. For the K-series firefighting cameras, click Configure Camera, then Check for Updates.
You can also click Check for Updates from the Help menu in FLIR Tools.
If an update is found, it will show the new version and, if it is registered, you can proceed with the update.
This procedure will include detailed steps necessary to update the firmware on FLIR Cx, Ex, Exx,/Exx-EST, T4xx, T6xx, T5xx/T5xx-EST, T8xx and T10xx series cameras manually, without FLIR Tools software.
Firmware updates for FLIR’s Handheld cameras were previously performed through FLIR Tools. However, as FLIR Tools has been discontinued, it may no longer automatically detect the latest firmware updates. Therefore, to keep your FLIR camera up to date with the latest firmware, you will have to perform the update manually.
Prerequisites:
•Fully charged camera battery
•SD (Memory) Card
•USB Cable (Preferred method)
•Computer with an SD card slot or compatible SD adapter(Optional)
Firmware Download
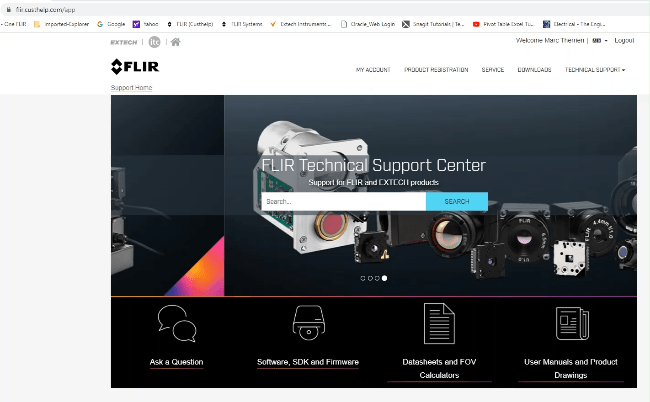
1.Login or create a new FLIR custhelp account (you need to be logged in to download firmware).
2.Go to DOWNLOADS on the top of the screen and select Software and Firmware, or click on HERE.
3.From the dropdown menus: Select Product Firmware; Thermal Cameras (Handheld); (Your camera series) FLIR XXXX Series, (or search for your camera series directly in the Search Bar to the right, and click SEARCH)
4.Click on the link to bring up the.ZIP file
5.Click the .ZIP file to download.
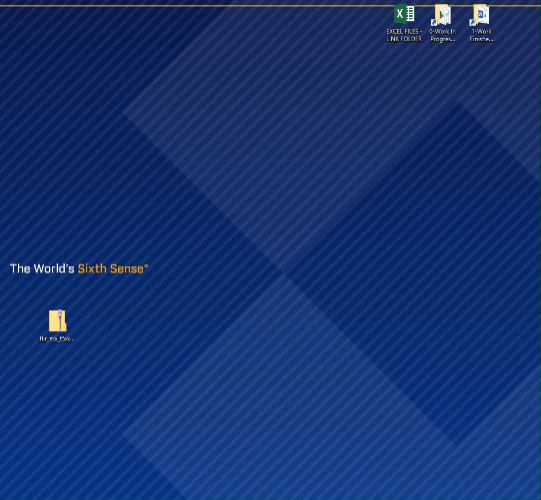
6.Save the .ZIP file to your computer desktop.
SD Card Preparation Through USB (Preferred Method)
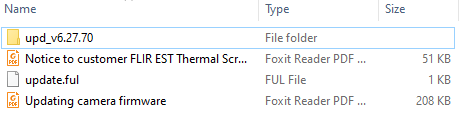
1.Unzip/extract the compressed .zip file to your desktop. You should now have a folder labeled flir_xx_xx_vxx_update_pack. That folder contains:
◦The update.ful file
◦A sub-folder (upd_vxx.xx.xx) that includes the update files
◦Directions for updating the firmware.
2.Connect the supplied USB cable between the camera and your computer. (Your computer should detect a USB device)
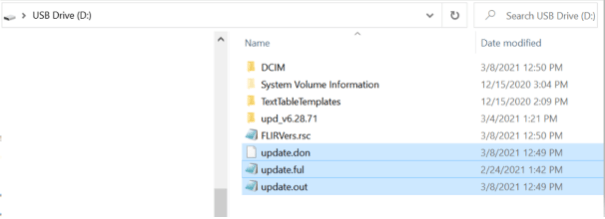
Note: Before proceeding with the next step, you need to remove/delete any existing files named update.don, update.out, and update.ful that may have previously been saved in the root directory of the SD card. (If there is no update.don/out/ful files, you can proceed to step 3 directly)
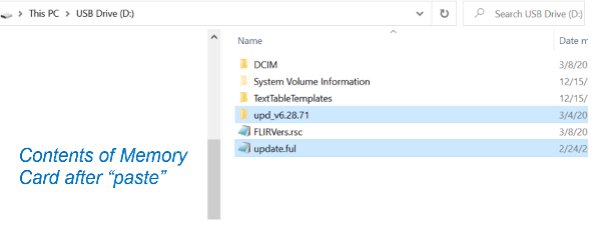
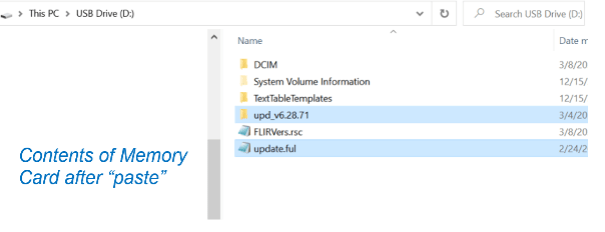
3.Copy the unzipped update folder (upd_vxx.xx.xx) and the update.ful file from the computer and paste them into the root directory of the SD (Memory) card.
SD Card Preparation with Card Reader
1.Insert the SD card into your SD card reader or directly into your computer.
2.Unzip/extract the compressed .zip file to your desktop. You should now have a folder labeled flir_xx_xx_vxx_update_pack. That folder contains:
◦The update.ful file
◦A sub-folder (upd_vxx.xx.xx) that includes the update files
◦Directions for updating the firmware.
Note: Before proceeding with the next step, you need to remove/delete any existing files named update.don, update.out, and update.ful that may have previously been saved in the root directory of the SD card. (If there is no update.don/out/ful files, you can proceed to step 4 directly)
3.Copy the unzipped update folder (upd_vxx.xx.xx) and the update.ful file from the computer and paste them into the root directory of the SD (Memory) card.
4.Eject the SD-card from your card reader or your PC.
5.Insert the SD-card into the camera while the camera is without the battery.
6. Insert the battery into the camera.
Special Case T4xx and T6xx-Series
The T4xx and T6xx seriescamerasare running an older OS, therefore, the procedure is slightly different for these models.
1.Check you camera’s part number (P/N). If the P/N starts with 55901/55902 (T6xx) or 62101/62102 (T4xx) it is a Mk Icamera,
If the P/N starts with 55903/55904 (T6xx) or 62103/62104 (T4xx) it is a Mk IIcamera.
2.Download the correct firmware file from Software and Firmware, under DOWNLOADS or click on the links below.
3.Access the SD-card with one of the options explained above. Either through USB-cable or through an SD Card Reader.
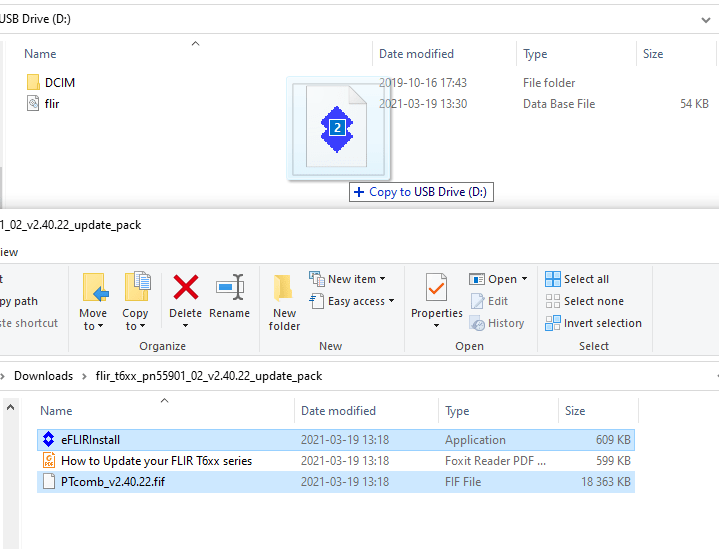
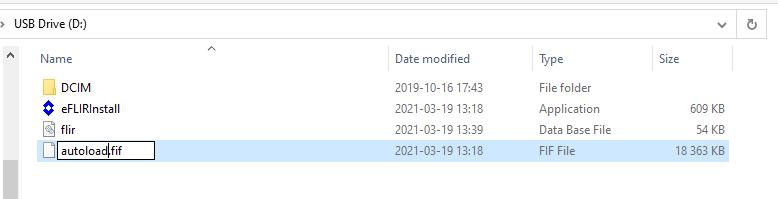
4.Open the FLIR Txxx (P/N xxxxx /xxxxx)Update Pack x.xx.xx.zip file and copy PTcomb_vx.xx.xx.fif and eFLIRInstall.exe files into the root directory of the camera’s SD-card.
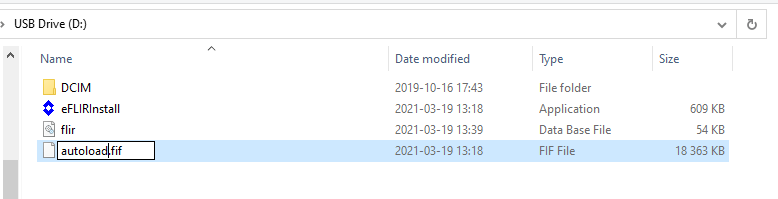
5.Rename the PTcomb_vx.xx.xx.fif file to autoload.fif
6.Go to the next step
Special Case Exx-Series cameras built before 2017
The older Exx series cameras (E40, E50, E60, etc) are running an older OS, therefore, the procedure is slightly different for these models.
1.Check you camera’s part number (P/N). If the P/N starts with 645xx/645xx, choose Update Pack 5.3.0. If the P/N starts with 490xx, choose Update Pack 2.27.16
2.Download the correct firmware file from Software and Firmware, under DOWNLOADS or click on the links below.
3.Access the SD-card with one of the options explained above. Either through USB-cable or through an SD Card Reader.
4.Open the FLIR Exx (P/N xxxxx /xxxxx)Update Pack x.xx.xx.zip file and copy PTcomb_vx.xx.xx.fif and eFLIRInstall.exe files into the root directory of the camera’s SD-card.
5.Rename the PTcomb_vx.xx.xx.fif file to autoload.fif
6.Go to the next step
Performing the Update
Caution: The camera may be damaged if power is interrupted during the update. Do not turn off the camera, remove or disconnect the power source. Do not remove the SD card while the update is in progress.
Make sure the camera battery is fully charged before you begin!
1.Disconnect the USB cable from your camera (USB method) or start up the camera (Card reader method.)
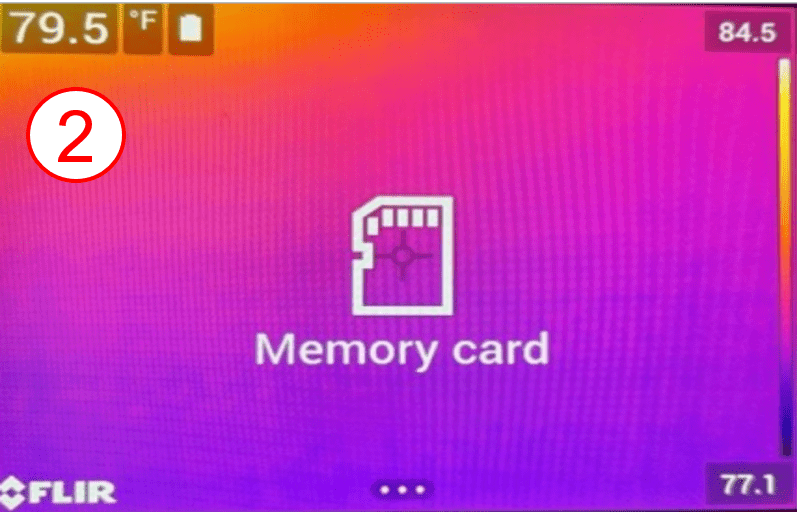
2.The camera should detect the SD (Memory Card) automatically.
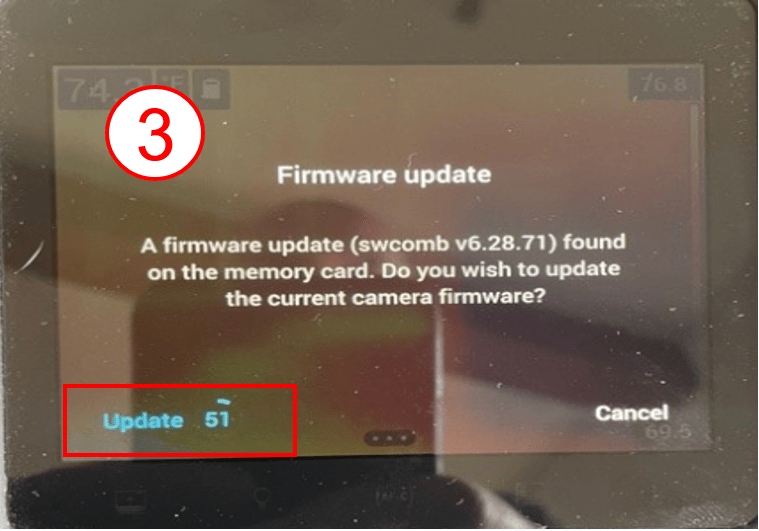
3.You will need to confirm the update by selecting Update or Cancel when prompted on the camera. Select Update.
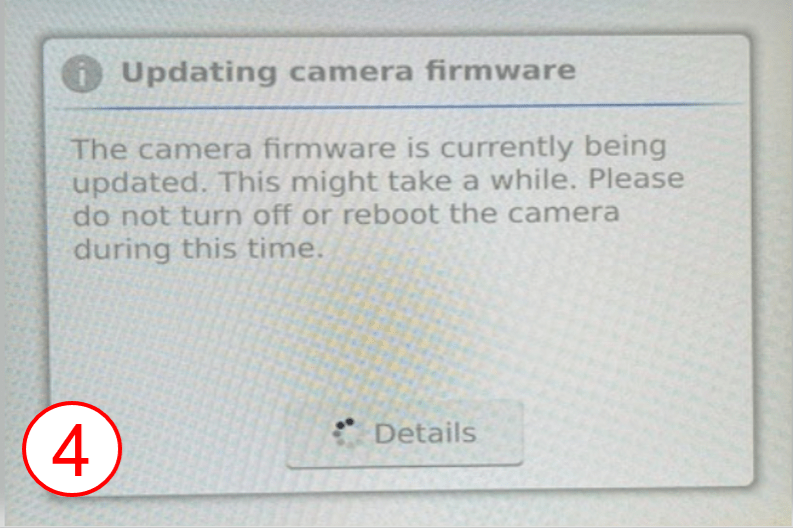
4.The firmware installation will begin. Wait for the installation to complete. (This could take approximately 3 minutes or more)
5.When the firmware update is complete the camera will reboot, and a live IR image should be displayed on the screen.
Note: You can verify the new firmware update by checking the version number in the Camera Information section under the Device Settings.
FLIR – K2, Kx3 & Kx5 Series Cameras Configuration
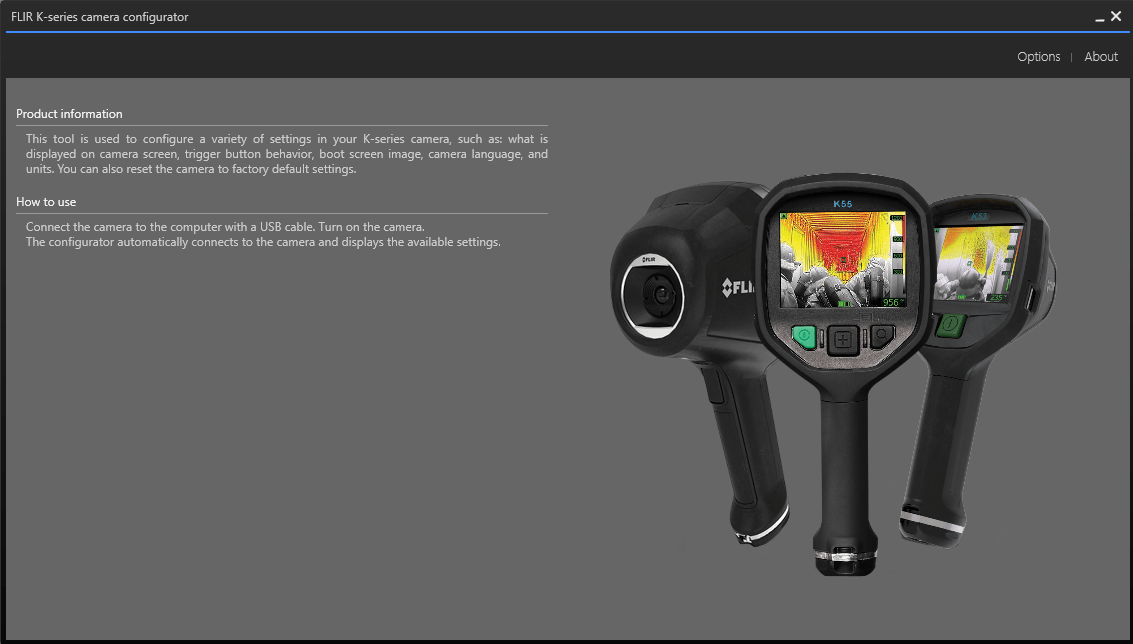
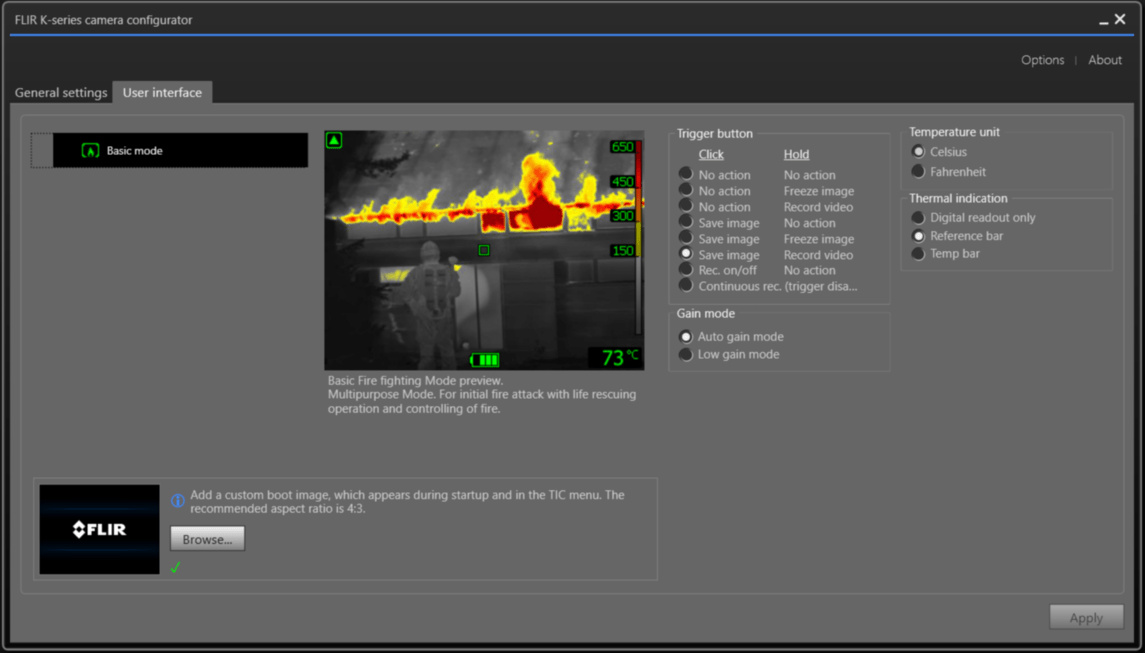
The K-series camera configurator is an application used to customize the camera display graphics and the function of the trigger button.
Disclaimer: FLIR Tools has been discontinued and is no longer supported. We recommend using the new FLIR K-series camera configurator for future use.
Be aware: Make sure to only use the FLIR K-series camera configurator when configuring your camera. If you have FLIR Tools installed, do not use FLIR Tools at the same time as the configurator. There might be conflicts between the two softwares causing the configurator application not to work as expected
Note: The FLIR K-series camera configurator does not support K1, K40 & K50 models.
1. K-Series Camera Configurator
In order to configure your FLIR K-series camera you need to have FLIR K-series camera configurator installed on your computer.
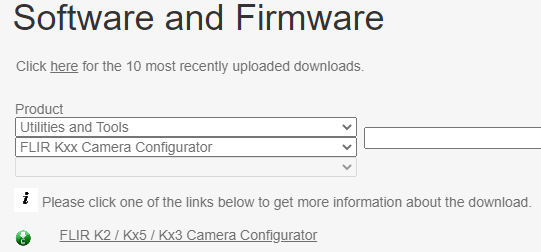
FLIR K-series camera configurator can be downloaded from this link: (Login required). Use the drop down menu, select “Utilities and Tools” and then “FLIR Kxx Camera Configurator“.
2. Configure Camera
1. Download and install the software.
2. Power on the camera.
3. Connect the camera to the computer via USB cable.
4. Run the K-series camera configurator application.
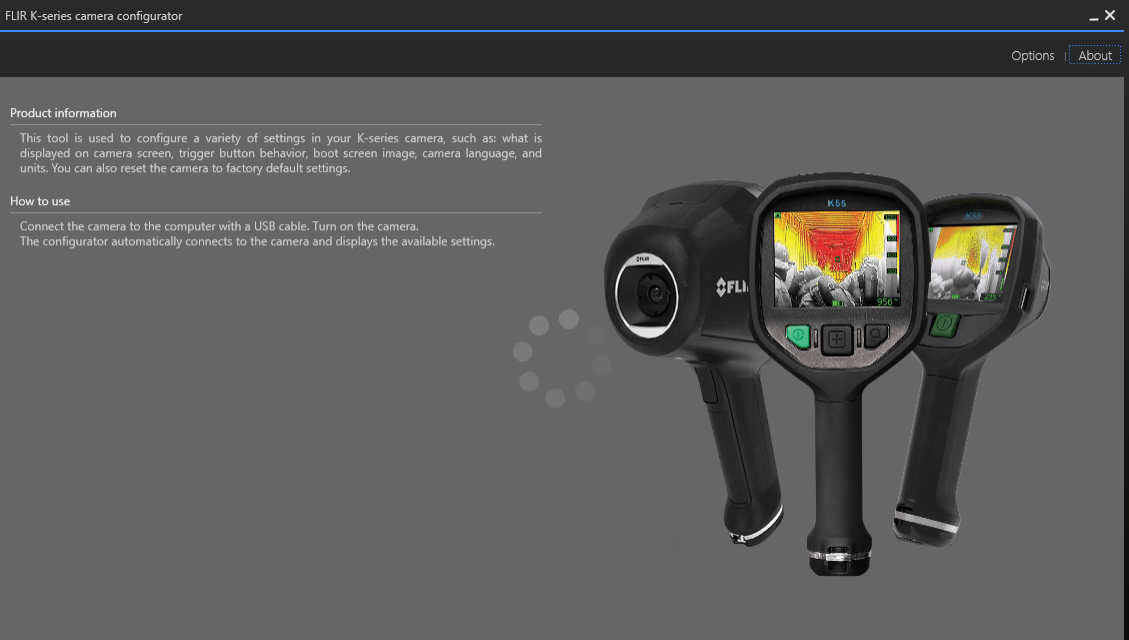
5. Once you have started the configurator, you will see a loading icon in the middle of the application before entering the general settings menu.
3. General Settings
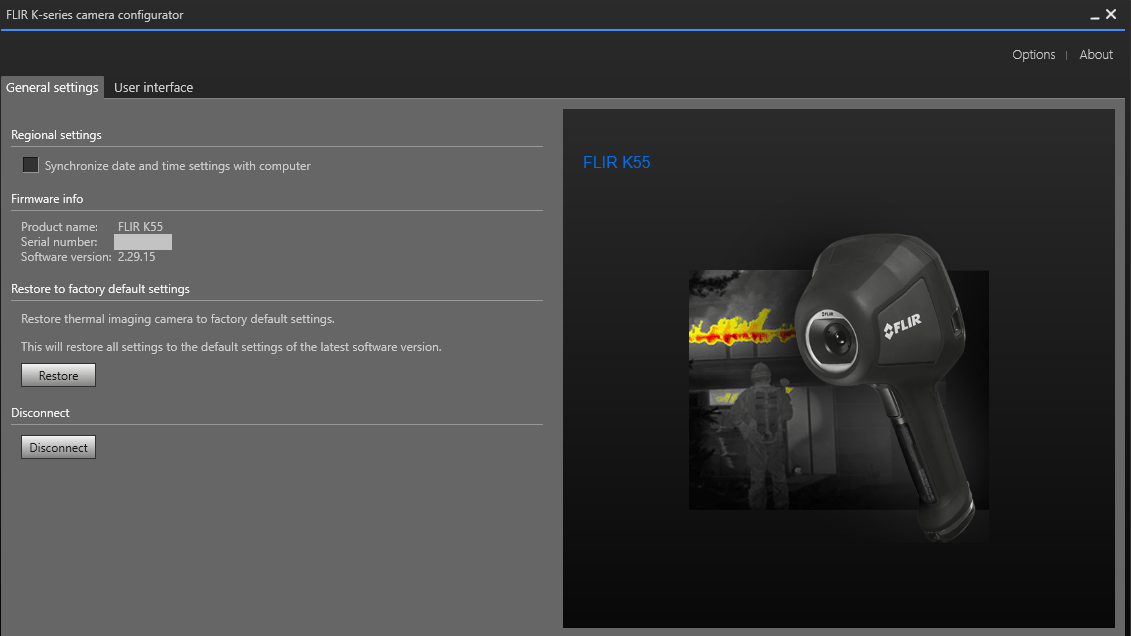
Under general settings, you can see the product name, the installed firmware version, the camera’s serial number, and the ability to restore the camera to factory default settings.
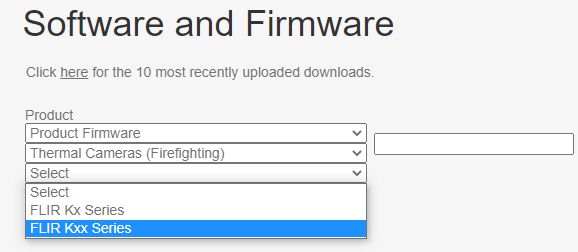
To check whether a newer version of the camera firmware is available, you can go to our Software and Firmware (login required) download section. Under Product Firmware, select “Thermal Cameras (Firefighting)”, your camera series, and look at the firmware version number.
For instructions on how to update your camera, go check out this guide.
4. User Interfaces
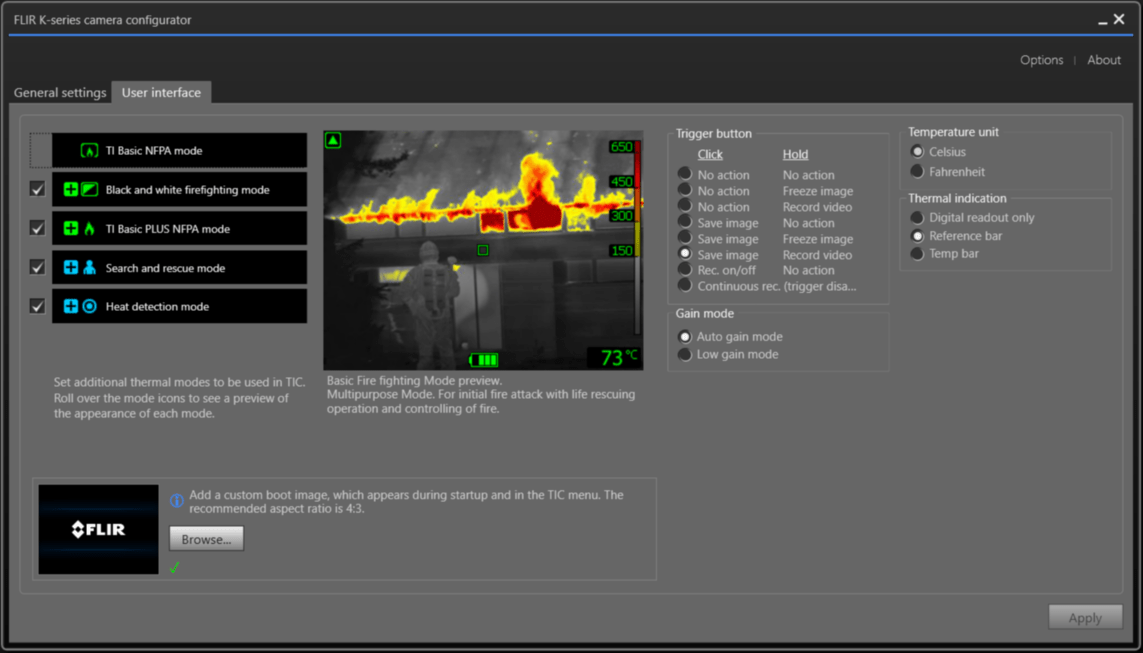
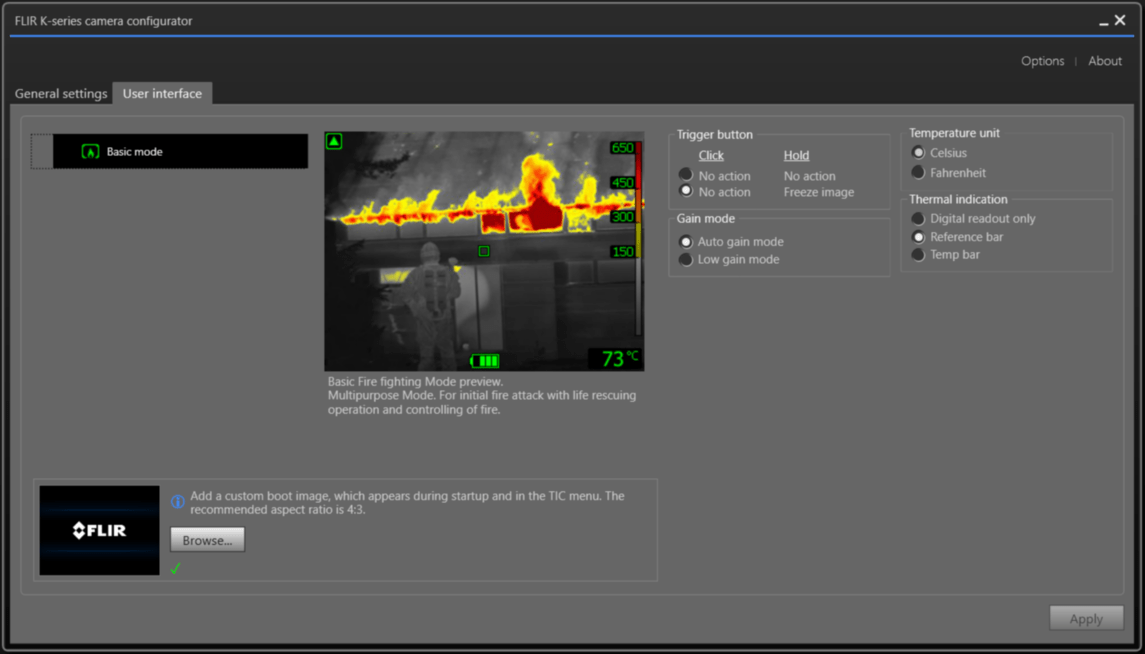
In the user interface section, it is possible to configure the color mode, trigger button, temperature unit, gain mode, thermal indication and the boot image. In the options menu, you can change the language.
Note: The user interface varies depending on the camera model.
Kx5 series:
K33 series:
K53 series:
K2:
.
Download FLIR K-Series Software & Firmware
Update your K-Series to the latest firmware version by downloading the small PC-compatible program to your desktop. Instructions are included in the zip file below.
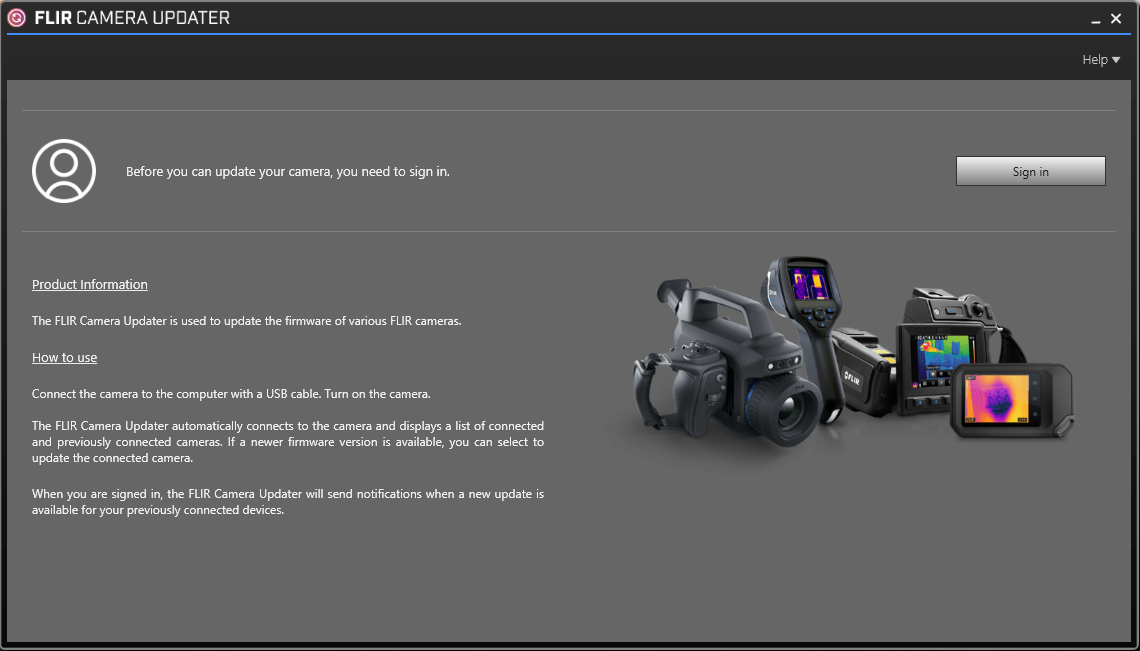
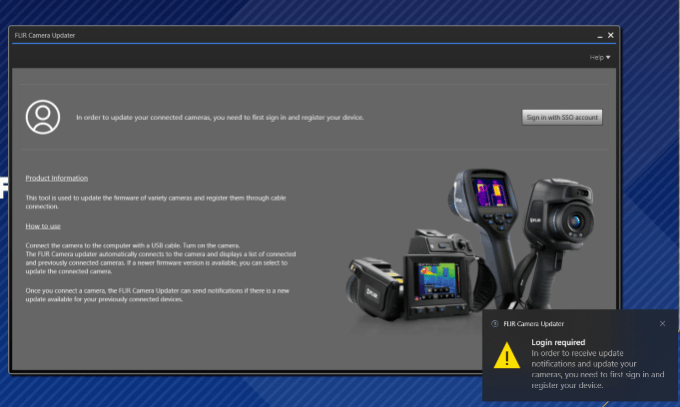
The FLIR Camera Updater is a stand-alone Windows-based application that is used to update FLIR cameras
Summary:
•With the FLIR Camera Updater it is an easy step-by-step guided procedure to update your camera firmware.
•The application keeps track of cameras earlier connected and notifies you when an update is available
•From the application there is a link to release notes, the FLIR web site for product info and to the Cust Help pages for user guide.
•Please see below for compatible cameras, system requirements, installation instructions and user guide.
Download and Installation Guide
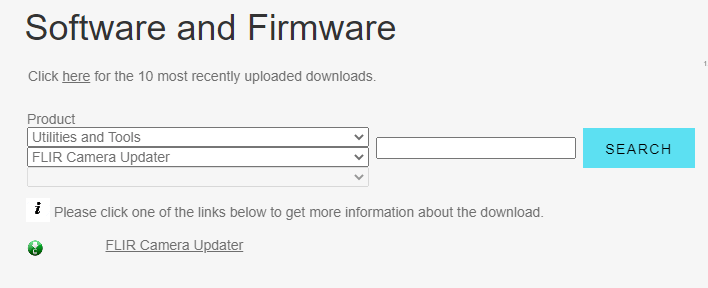
1.FLIR Camera Updater can be downloaded from this link: (Login required).
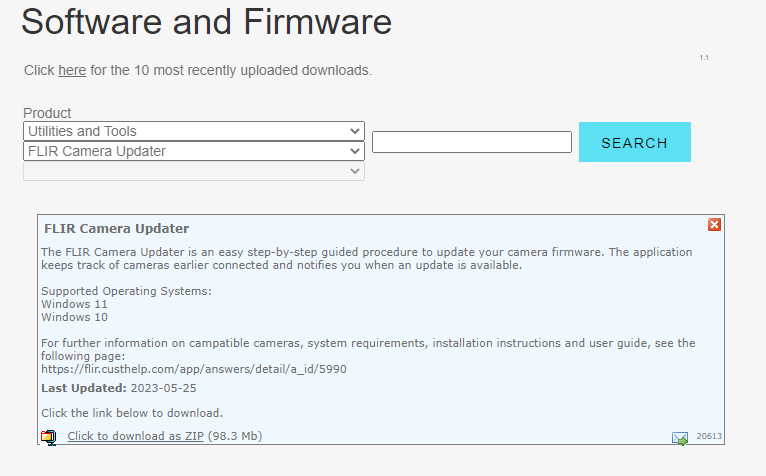
2.Use the drop down menu, select “Utilities and Tools” and then “FLIR Camera Updater”.
3.Click on the “FLIR Camera Updater“ link and then press the “Click to download as .ZIP“ link to download the file for the application.
4.Extract the .exe file, run it, and follow the installation Wizard.
5.Start the application.
6.Now you can connect the camera that you want to update, or recieve future notifications for updates.
Follow the instructions below to complete the camera firmware update.
1.Start the application
2.Create a FLIR account or sign in to your current one through the application.
3.Power on the camera (if SD Card slot is available in the camera, insert SD card in the camera before power on the camera).
4.Connect the camera to the computer by USB.
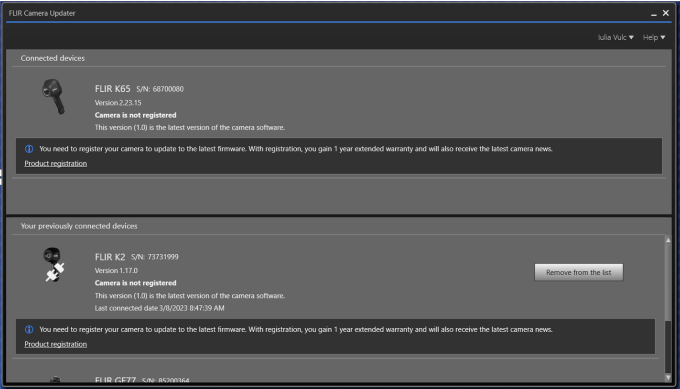
5.Once your camera is connected to your computer, you will see the camera name and its current firmware version.
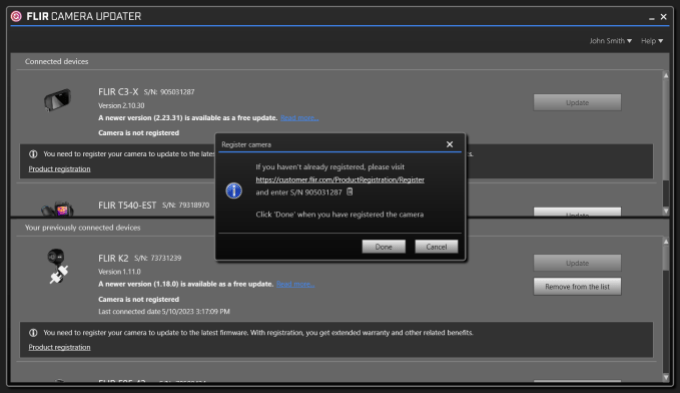
6.If the camera is not registered, the application will notify you and provide instructions how to register the camera. Follow the instructions to register the camera to be able to continue with the camera update.
7.When the camera is registered, the registration pop up will disapear.
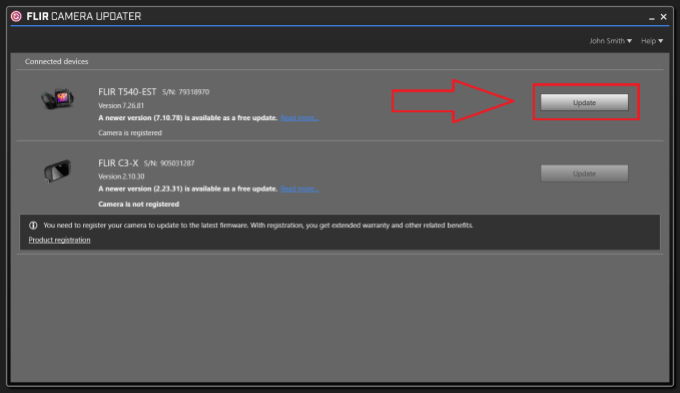
8.If the camera has an update, it will show a message that newer version is available with an update button. Click on the Update button to proceed to update the camera to the newer version. (The Update button is disabled if the camera is not registered).
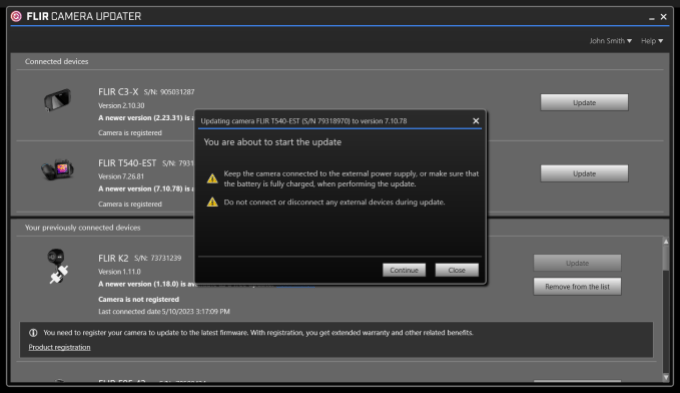
9.After pressing update, a warning pop up message will show up and inform you that you are about to start the update. Make sure that the battery is charged and do not disconnect the camera when installing the update. Then press continue.
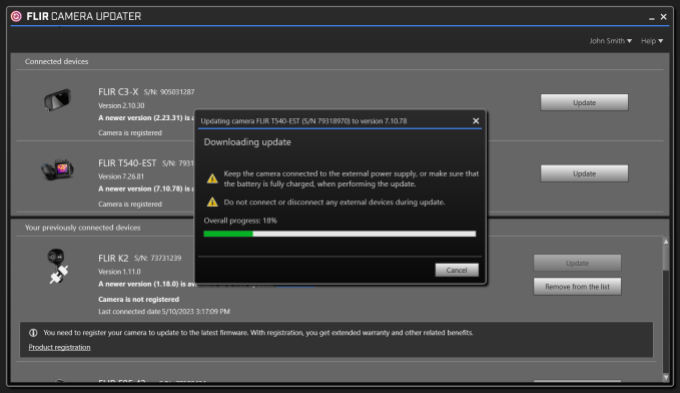
10.The firmware is now downloading to the cameras memory card. The green loading bar shows the progress.
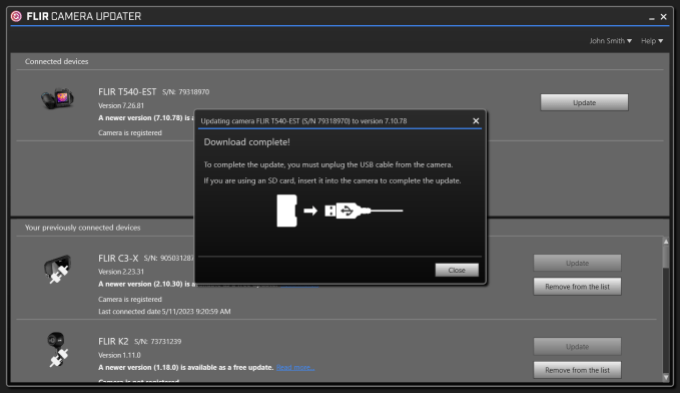
11.When the download is complete, you will get a prompt message to disconnect the camera from the computer.
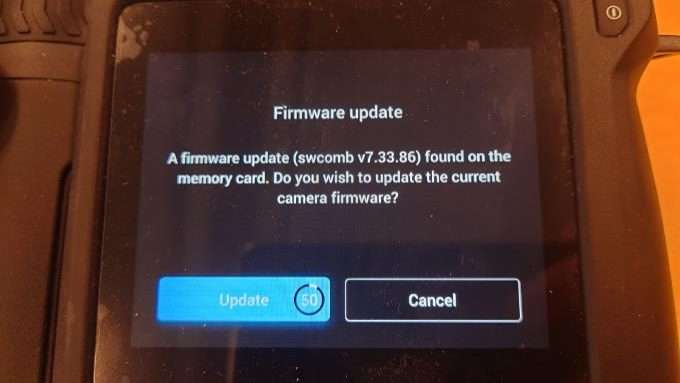
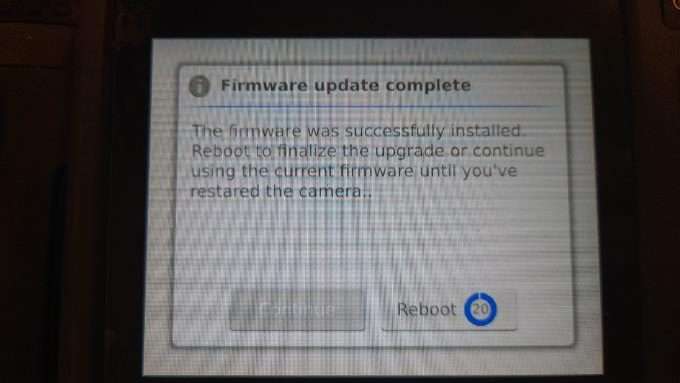
12.After you have disconnected the camera, you will be prompted to install the downloaded firmware on the camera screen. After you press “update” or wait 60seconds, the camera will start the installation (Please note: the two images below shows an update example from a T540, other camera models may have different firmware versions and text wording).
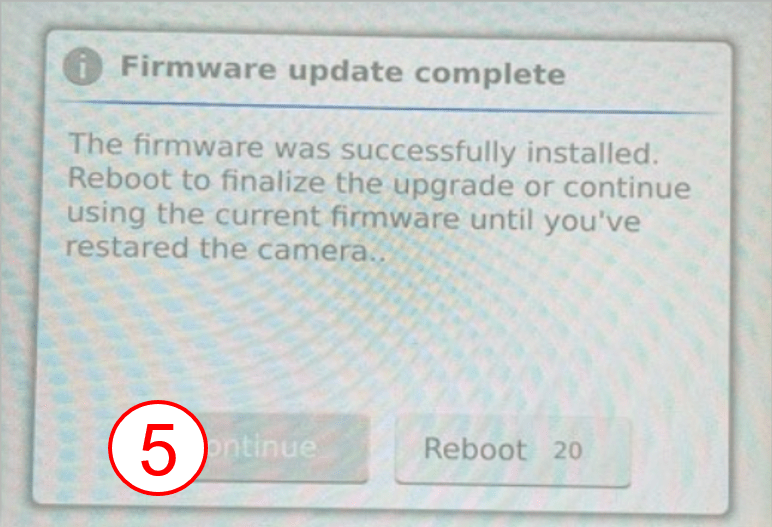
13.When the firmware update is complete, the camera will prompt you to reboot to finalize the update.
FAQs
•My camera was disconnected during the firmware update and got aborted. Now when I try to re-connect the camera, it is not discovered by the application.
◦This is a know issue. If you restart the FLIR Camera Updater application, the camera will be discoverable again.
•Do I need a internet connection to use the application?
◦Yes, an internet connection is required by the application to notify you when new updates are available and in order to download and update the camera firmware.
•My camera does not accept the update.
◦If you ever find yourself unable to update the camera, please reset the camera to factory settings and try again.
Download FLIR Duo Firmware and Software
Updating the FLIR UAS App
Please download the latest handset application from the appropriate web store for your platform. Some handy links are listed below. Also be sure to keep the OS up to date on your device as Bluetooth is an evolving protocol and receiving continuous improvements.
1.Backup Duo Settings – Connect to the Duo with the Bluetooth application and make note of all your settings. The firmware upgrade will reset the camera settings to defaults since we typically are adding features and the previous settings may not be optimal for your application.
2.Download Firmware Update – Download the firmware upgrade archive to your computer and unzip the Duo_I_V#.#.#.ITM file. Load this file onto the camera micro SD card either by connecting your Duo to the computer with the included Bench cable, or through another suitable micro SD card reader.
3.Power on Duo – Power on the Duo and wait for it to complete the boot cycle (you’ll hear the three beeps and see the Bluetooth light go steady blue and the Record light go steady green).
If the Bluetooth radio does not enable, press the button to it on. You will see a blue light.
4.Start Update Process – Open the FLIR UAS app and connect to the camera. The app will read the camera’s settings, then display the Firmware update message. Select “Yes.” The Bluetooth light will flash purple for 30-45 seconds while it’s updating, then the camera will re-boot. During this time, you’ll see the Bluetooth disconnect message.
5.Reconnect via Bluetooth – Once rebooted, reconnect your handset to the camera by selecting ‘Yes’ from the Bluetooth Disconnect dialogue. The camera should reconnect and present you with the Main screen. If you previously selected ‘No’ in this dialogue you will need to go to Settings -> About -> Scan for Devices to reconnect.
6.Restore User Settings – From your notes in Step 1, reconfigure any Main, PWM, Accessory Port, and Radiometry (Duo R only) settings for your specific application.
Change Log
FW 2.1.7
•Updated TIFF file format to enable conversion to temperature. Now TIFF data can be converted to temperature in post-processesing. See User Guide for details.
•Updated RJPG file names: added “_R” to end of file names, to clarify file type from RGB .jpg image files.
•Miscellaneous bug fix
FW 2.1.4
Note: This Vue Pro firmware update requires the following APP versions for full functionality: Android & iOS APP version ≥ 2.0.0
•New FLIR TCP/IP interface allows you to control your Duo/R camera via a virtualized ethernet interface through the USB port. Find the full documentation here: FLIR Duo User Guide.
•Improved MSX adjustment parameters allow you to better optimize the scene.
•Improved RJPEG compatibility with FLIR Tools and ResearchIR.
•Improved file compatibility with 3rd party mapping software.
•Various bug fixes and stability improvements.
FW 1.2.12
•Code fix for intermittent PWM communication errors
•Miscellaneous optimization & bug fix
.
Download FLIR Vue Pro Firmware and Software
Updating the FLIR UAS App
Please download the latest handset application from the appropriate web store for your platform. Some handy links are listed below. Also be sure to keep the OS up to date on your device as Bluetooth is an evolving protocol and receiving continuous improvements.
1.Backup Vue Pro Settings – Connect to the Vue Pro with the Bluetooth application and make note of all your settings. The firmware upgrade will reset the camera settings to defaults since we typically are adding features and the previous settings may not be optimal for your application.
2.Download Firmware Update – Download the firmware upgrade archive to your computer and unzip the Vue_Pro_I_V#.#.#.ITM file. Load this file onto the camera micro SD card either by connecting your Vue Pro to the computer with the included Bench cable, or through another suitable micro SD card reader.
3.Power on Vue Pro – Power on the Vue Pro and wait for it to complete the boot cycle (you’ll hear the three beeps and see the Bluetooth light go steady blue and the Record light go steady red).
If the Bluetooth radio does not enable, press the button to it on. You will see a blue light.
4.Start Update Process – Open the Vue Pro app and connect to the camera. The app will read the camera’s settings, then display the Firmware update message. Select “Yes.” The Bluetooth light will flash purple for 30-45 seconds while it’s updating, then the camera will re-boot. During this time, you’ll see the Bluetooth disconnect message.
5.Reconnect via Bluetooth – Once rebooted, reconnect your handset to the camera by selecting ‘Yes’ from the Bluetooth Disconnect dialogue. The camera should reconnect and present you with the Main screen. If you previously selected ‘No’ in this dialogue you will need to force quit and restart the APP on your handset.
6.Reset to Factory Defaults – Select the Advanced button in the lower left of the screen, then the About tab, and finally ‘Reset to Factory Defaults’ button. A warning box will be presented, please select ‘Yes’. All the files on the micro SD card will be preserved, only the flash memory on the VuePro camera will be reset. This will ensure proper operation of the camera with the new firmware.
7.Restore User Settings – From your notes in Step 1 reconfigure any Main, PWM or Accessory Port settings for your specific application.
Change Log
FW 3.1.3
Note: This Vue Pro firmware update requires the following APP versions for full functionality: Android & iOS APP version ≥ 2.0.0
•Bluetooth broadcast name is now the model and serial number of the camera.
•SD card status and capacity now shown in the App.
•Improved RJPEG compatibility with FLIR Tools and ResearchIR.
•Improved file compatibility with 3rd party mapping software.
•Improved BT connectivity.
•Corrected error where GPS coordinates East of GMT were reported West.
•Corrected issue where Temp Range data could be incorrectly written to RJPEG & TIFF files.
•Various bug fixes and stability improvements.
FW 2.1.2
Note: This Vue Pro firmware update requires the following APP versions for full functionality:
Android APP version ≥ 0.1.81 iOS APP version ≥ 1.4
•Changed name of APP from FLIR Vue Pro to FLIR UAS
•Added a device selection menu for choosing between multiple cameras
•Restored 8-bit JPEG image capture for Vue Pro / R
•Renamed most still and video files to clarify 8-/14-bit
•Improved menus and user interface
•Improvements to Bluetooth connection and stability