Views: 28
Security Camera Mounting Methods, This guide gives a practical overview of how to install a security camera on almost any common surface, including brick, concrete, wood, vinyl siding, and situations where you want to avoid drilling altogether. If you already know your surface, you can jump to the relevant section below and then visit the full guide for detailed steps.
How to Mount a Security Camera on Any Surface
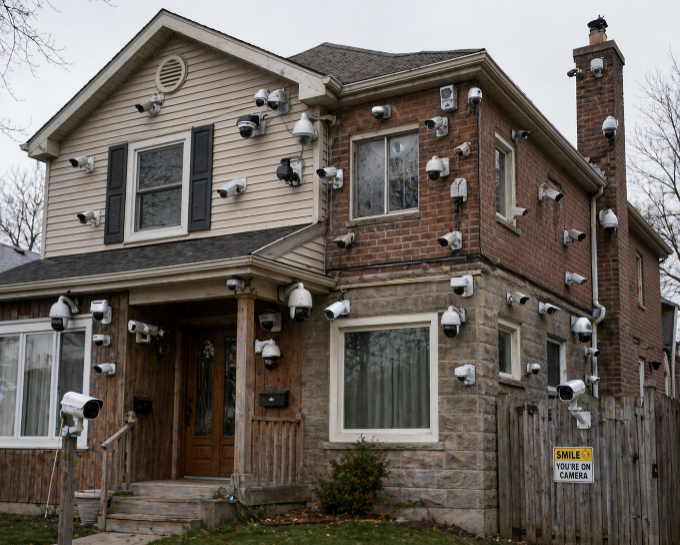
Some surfaces make installation simple, while others require extra care, different hardware, or even a completely different mounting method.
This guide gives a practical overview of how to install a security camera on almost any common surface, including brick, concrete, wood, vinyl siding, and situations where you want to avoid drilling altogether. If you already know your surface, you can jump to the relevant section below and then visit the full guide for detailed steps.
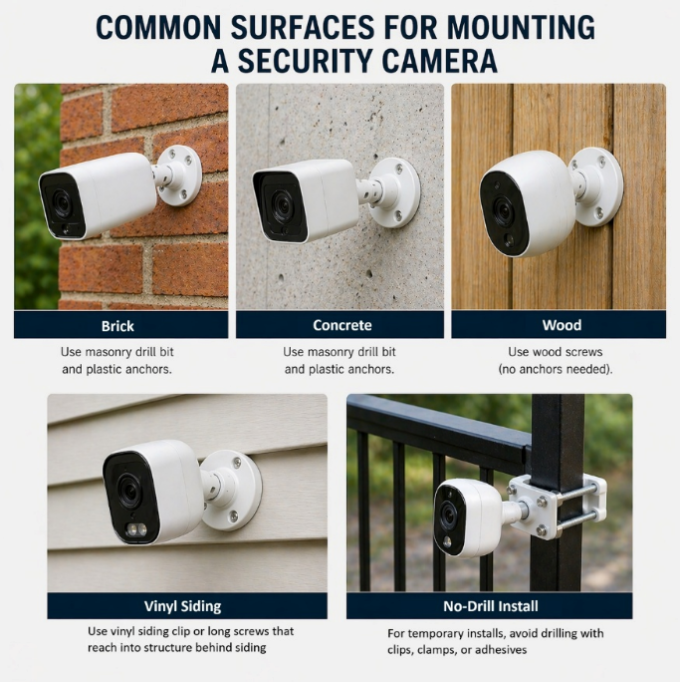
What to Consider Before You Install
Before looking at surface-specific methods, think about the basics that apply to almost every install.
Look for:
Avoid:
No matter what surface you choose, good placement matters more than anything else.
A perfectly secure install in the wrong location will still give you poor results.
Security Camera Mounting Methods
How to Mount the Camera on Any Surface
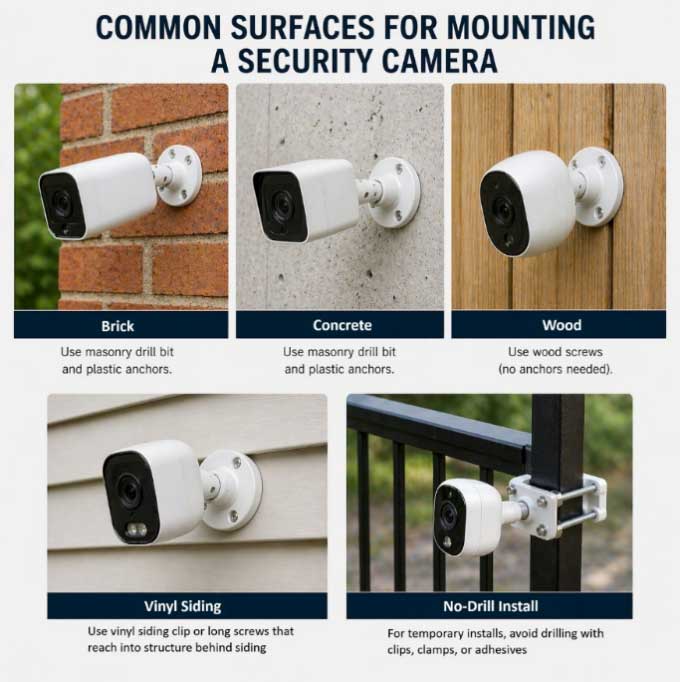
Different surfaces need different hardware and techniques.
Wood
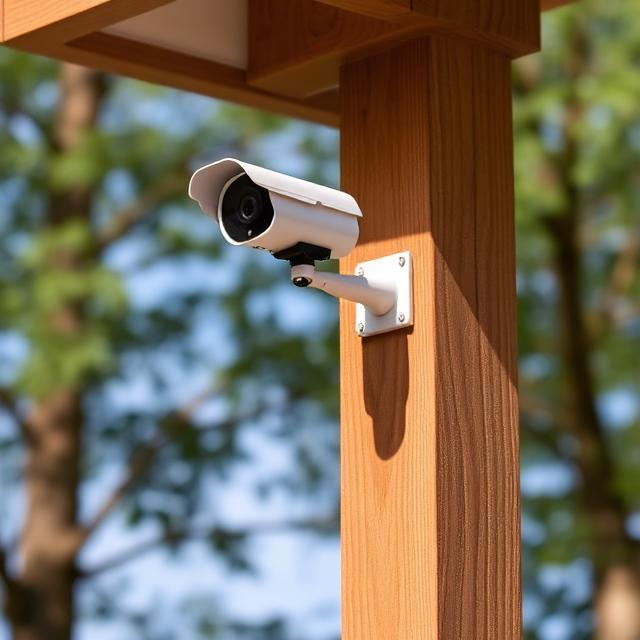
Wood is usually the easiest surface to mount a security camera on.
In most cases, you can screw the camera mount directly into the wood using only a drill and the hardware that comes with your camera. Optional steps like pilot holes and exterior sealant can improve long-term stability.
Wood is often a great option when it is:
Read the full guide: How to Install a Security Camera on Wood
Brick
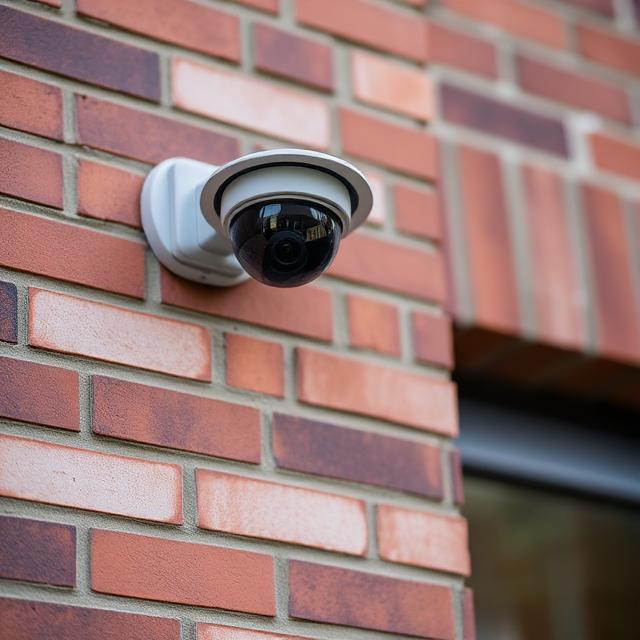
Brick is a strong and durable mounting surface, but it requires careful drilling and anchors.
For brick installation, you generally need:
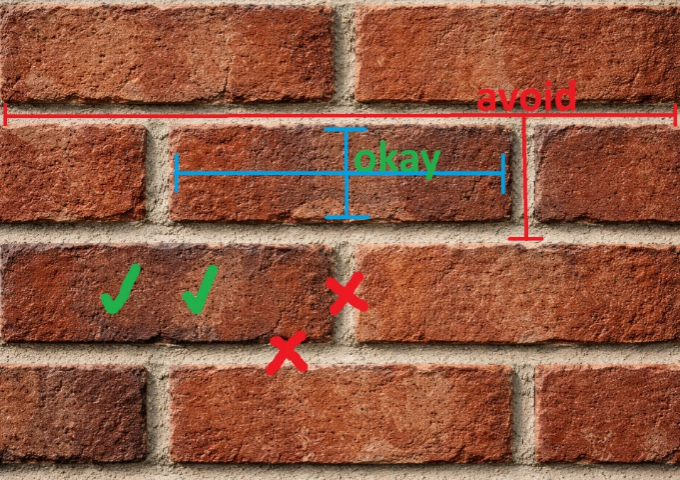
The most important rule is to drill into the brick itself, not the mortar. Mortar is easier to drill, but it is weaker and more likely to loosen over time.
Concrete
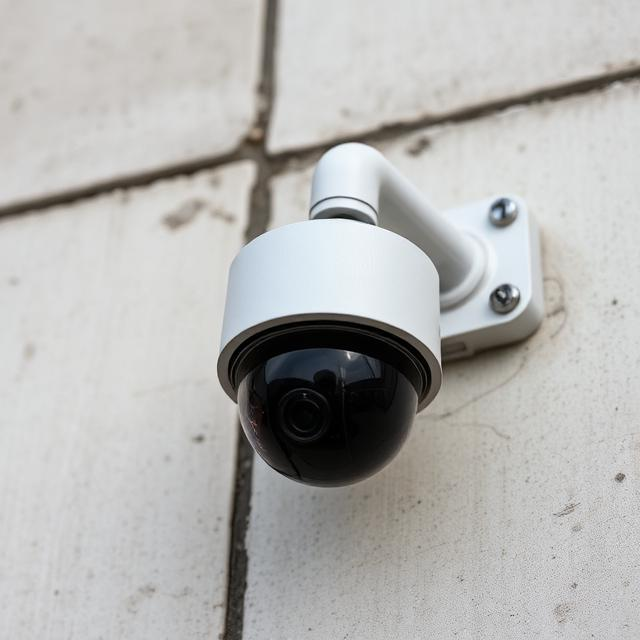
Concrete is also very strong, but it usually takes a little more effort than wood or brick.
A concrete installation often requires:
Concrete is a strong choice when you want a highly durable mount, but it is not the quickest or easiest surface to work with.
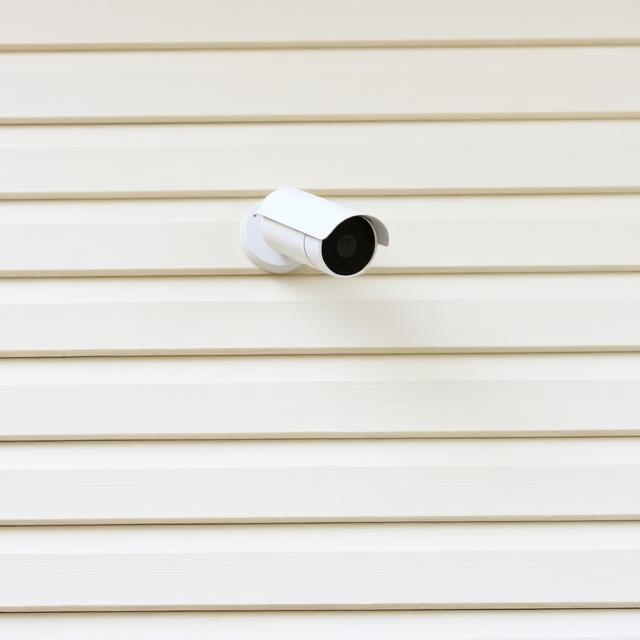
Vinyl Siding
Vinyl siding is one of the trickier surfaces because the siding itself is not designed to support weight.
That means you generally should not screw a camera mount directly into the vinyl alone. Instead, the two main options are:
If you choose to drill through the siding, you also need to think about sealing the holes properly to reduce the risk of water intrusion. If you are not sure what is behind the siding, it is better to confirm that before drilling.
Vinyl siding can work, but often the surface behind the siding is half the consideration.
No-Drill Installation
Sometimes you want or need to avoid drilling altogether.
No-drill installation methods can be useful when:
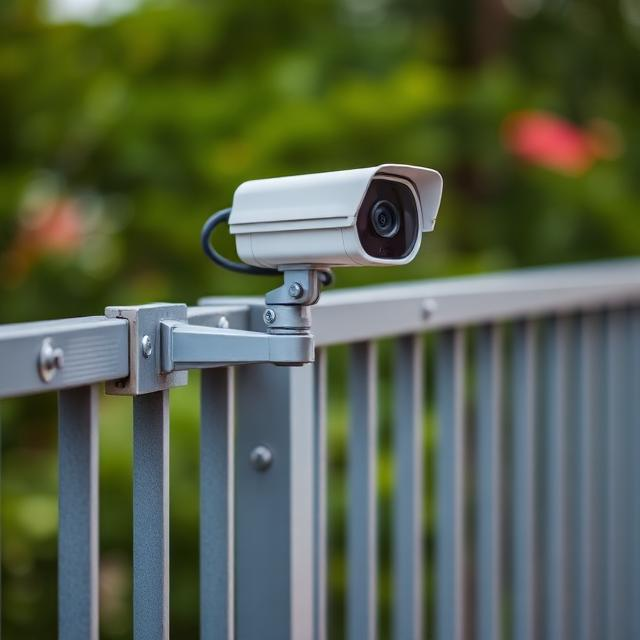
Common no-drill options may include:
The tradeoff is that no-drill methods are often less secure and less permanent than screw-mounted installations. They can still be a great option in the right situation.
Which Surface Is Best for Mounting a Security Camera?
If you are choosing between surfaces, here is the simple version:
Easiest to install
Most secure long term
Most surface-sensitive
Best for easy adjustment
That does not mean one surface is always better than another. In real situations, the best surface is usually the one that gives you the camera placement you want.
Common Mistakes to Avoid on Any Surface
Choosing the surface before choosing the placement
The best mounting surface is not always the best camera location. Coverage should come first.
Using the wrong hardware
Masonry surfaces need masonry tools. Vinyl siding needs special care. Solid wood usually does not need the same hardware as brick or concrete.
Ignoring weatherproofing
Outdoor holes, especially in wood or siding, should be sealed when appropriate to reduce the risk of moisture damage.
Mounting into weak material
Rotten wood, cracked concrete edges, unstable siding, or crumbling mortar can all lead to an unreliable installation.
Picking a no-drill method just because it seems easier
No-drill setups can be useful, but they are not always the best long-term option.
When You Should Use a Dedicated Surface Guide
This article is useful as a starting point, but the dedicated guides are better when you already know the material you are working with.
Use the full guide if you need:
Here are the full articles again:
To Wrap Up
There is no single best method for installing a security camera on every surface. Wood is usually the easiest, brick and concrete are among the most secure, vinyl siding requires more caution, and no-drill methods are best when avoiding damage matters more than permanence.
If you are not sure where to start, first identify the surface, then match your method to it. Once you know that, the dedicated guides can help you handle the actual installation more confidently.
FAQs
What is the easiest surface to install a security camera on?
Wood is usually the easiest surface to work with because screws can often be driven directly into it without anchors or masonry tools.
What is the most secure surface for a camera mount?
Brick and concrete are often among the most secure long-term mounting surfaces when installed correctly.
Can I install a camera on vinyl siding?
Yes, but you should not screw into the siding alone for support. A no-drill siding mount or drilling into the structure behind the siding is usually the better approach.
Can I install a security camera without drilling?
Yes. No-drill methods like gutter mounts, clamp mounts, adhesive options, and siding mounts can work in the right situations, though they are often less secure than permanent screw-mounted installs.
How to Mount a Security Camera on Wood
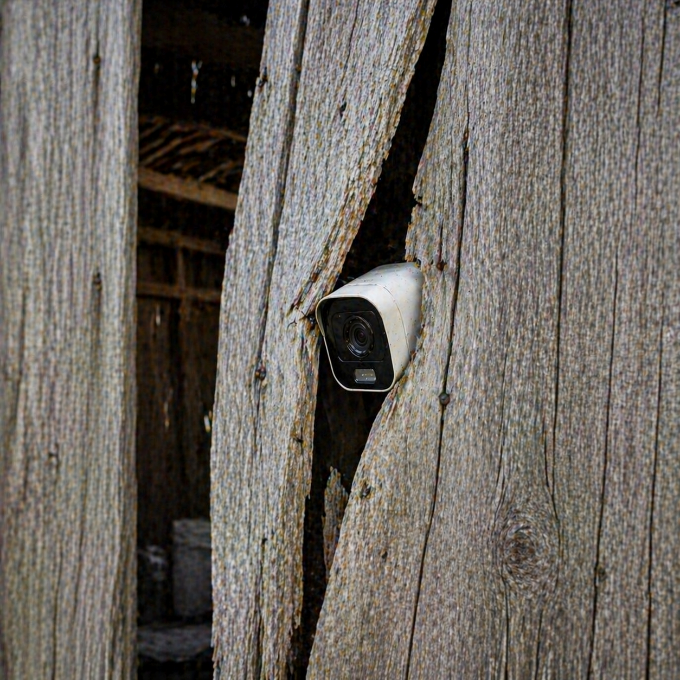
Wood is arguably the easiest surface to mount a security camera on. In most cases, you can screw the mount directly into the wood without needing any extra hardware.
This guide walks through how to install a security camera on wood securely, what tools you need, and what mistakes to avoid so your camera stays stable over time.
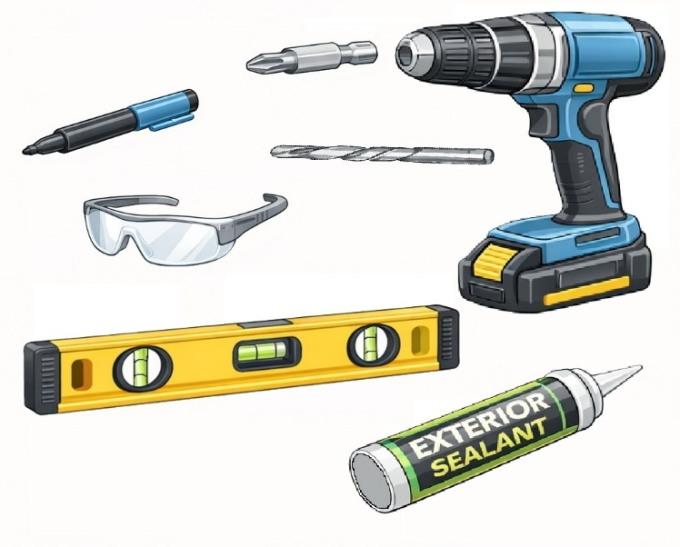
What You’ll Need
Before you start, gather the right tools:
Note: Screws almost always come with the camera.
Step 1: Choose the Right Location
Before mounting the camera, make sure the spot gives you the coverage you want.
Look for:
Avoid:
Consider having someone hold the camera in place while you check the view through your app or monitor to ensure it meets your expectations before installing.
Step 2: Check the Wood Surface
Not all wood surfaces are the same. You may be mounting into:
Solid, thick wood is ideal because it gives screws a better hold. Thin or damaged wood may not provide enough support, especially if the wood is thinner than the screws used for the mount.
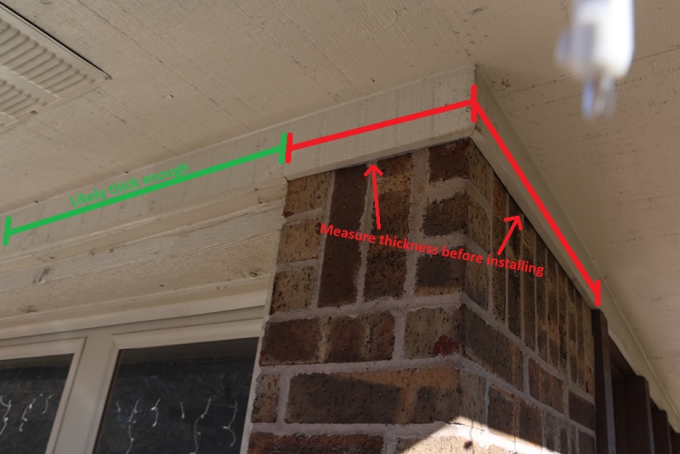
Step 3: Mark the Drill Holes
Hold the camera in the position where you want it installed, using a level if needed. Mark the screw positions through the holes in the mount.
Note: aosu cameras come with a placement sticker that can be used instead.
Step 4: Drill Pilot Holes (Optional)
Pilot holes are small starter holes that help guide screws into the wood.
This step can help:
Use a drill bit slightly smaller than your screw diameter and drill only as deep as needed.
Step 5: Add Sealant (Optional)
If you’re installing outdoors, you may want to apply a small amount of exterior-grade sealant around each hole.
This can help:
A small amount is enough. Overapplying can make the mount uneven.
Step 6: Attach the Mounting Bracket
Line up the mount with the pilot holes and drive in the screws.
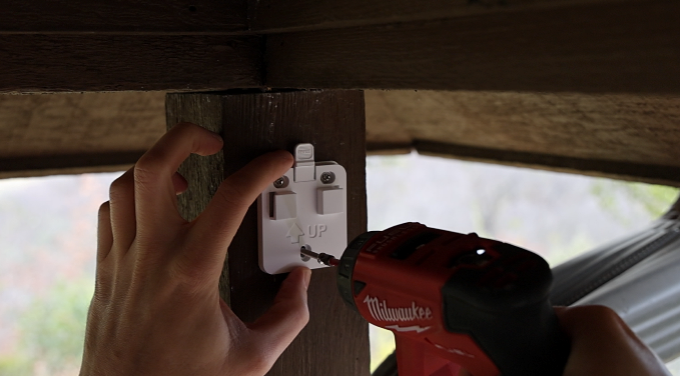
Step 7: Mount and Adjust the Camera
Attach the camera and adjust the viewing angle if applicable. Once positioned, tighten adjustment points so the camera stays fixed.
Common Mistakes to Avoid
To Wrap Up
Installing a security camera on wood is a straightforward project when the surface is solid and properly prepared.
Focus on choosing a strong mounting point, using pilot holes, and sealing outdoor installations to ensure long-term stability and protection.
FAQs
Do you need anchors for wood?
Usually, no. If you are mounting directly into solid wood, screws alone are typically enough. Anchors are generally used for materials like concrete, brick, drywall, or hollow surfaces.
Will installing on wood cause long term damage?
When properly installed, a camera mount on a wooden surface causes no damage aside from 2-3 small screw holes. If you remove the mount, the screw holes can be filled in and painted over which will make them practically disappear.
Is wood the best surface for mounting a camera?
Many surfaces can provide a stable and long-term mount, so it is more important to consider placement first and surface second. That being said, wood is generally the easiest surface to install a screw-in mount on.
How to Install a Security Camera on Brick (Step-by-Step Guide)
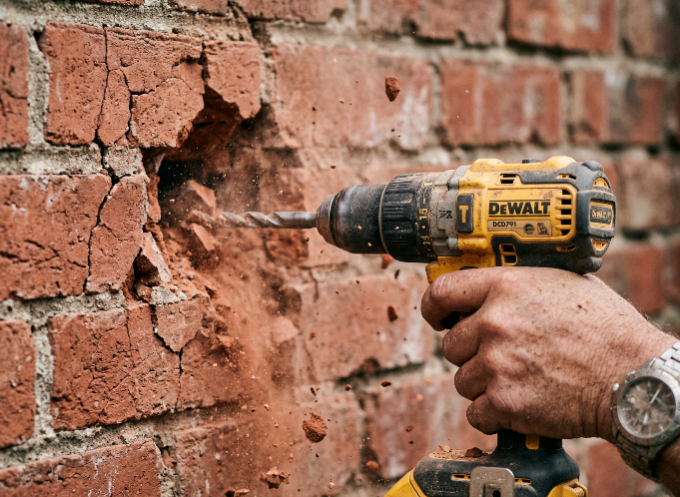
Think brick is going to crumble away? You may be pleased to hear brick is one of the most secure and durable materials you can mount to as long as you drill and anchor it correctly.
This guide walks through exactly how to install a security camera on brick without damaging your wall or compromising stability.
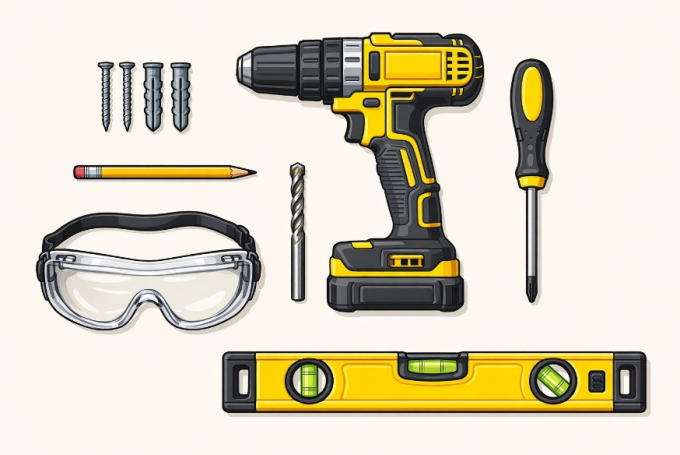
What You’ll Need
Before you start, gather the right tools:
Step 1 — Choose the Right Location
Before drilling, choose the placement carefully.
Look for:
Avoid:
Step 2 — Mark the Drill Holes
Hold the camera mount against the wall and mark the screw hole positions with a pencil.
Tips:
Step 3 — Drill Into the Brick
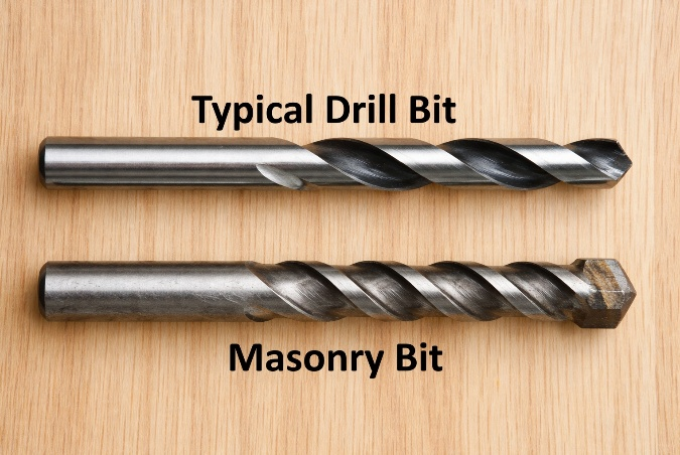
Use a masonry drill bit and drill slowly into the brick at your marked points.
Key tips:
Why avoid mortar?
Mortar is softer and easier to drill, but it’s also crumblier and mounts are more likely to loosen over time.
Drilling into brick gives you a much more secure installation.
Step 4 — Insert Wall Anchors
Push the anchors into the drilled holes.
They should fit snugly and sit flush with the wall. If needed, gently tap them in with a hammer.
Step 5 — Attach the Mounting Bracket
Line up the bracket with the holes and insert the screws. Tighten until the mount feels secure and doesn’t wobble
Overtightening can damage anchors and crack brick, so it’s recommended to use a screwdriver by hand. Be careful and take it slow if using a driver bit in your drill.
Step 6 — Mount and Adjust the Camera
Attach the camera to the bracket and adjust the angle if needed. Aim for a slightly downward angle with clear visibility of entry points or key areas
Once positioned, tighten any adjustment screws to lock it in place.
Common Mistakes to Avoid
o This is one of the most common issues and leads to unstable mounting.
o Screws alone won’t hold securely in brick. Anchors are essential.
o Regular drill bits are designed for wood and can wear out quickly or create uneven holes. Use masonry bits.
Can You Install a Camera on Brick Without Drilling?
Yes — but with limitations.
Alternatives include:
However, these are generally:
To Wrap Up
Brick is one of the most reliable surfaces for mounting a security camera, offering strong support and long-term durability.
By drilling into the brick (not mortar), using proper anchors, and choosing the right placement, you can get a secure installation that lasts for years.
Taking a few extra minutes to do it properly helps to avoid unnecessary damage to your home and gives your camera long-term stability.
FAQs
Can security cameras be mounted in brick?
Yes, brick is one of the most reliable and secure mounting surfaces, but it’s important to install the mount correctly. Drill into the brick, not the mortar. Use a masonry bit and anchors.
Will installing a security camera ruin brick?
If installed correctly, a security camera mount will only leave behind two or three small screw holes in a single brick, and the overall structure of the brick will remain stable.
Can security cameras be installed on brick siding/veneer?
Most security camera mounts use short screws which can generally be used for installation on brick siding. However, it’s best to compare the length of the mount screws with the thickness of your siding before proceeding. If the screws are longer than the siding is thick, you may need to consider a more complicated installation method.
How to Mount a Security Camera on Concrete
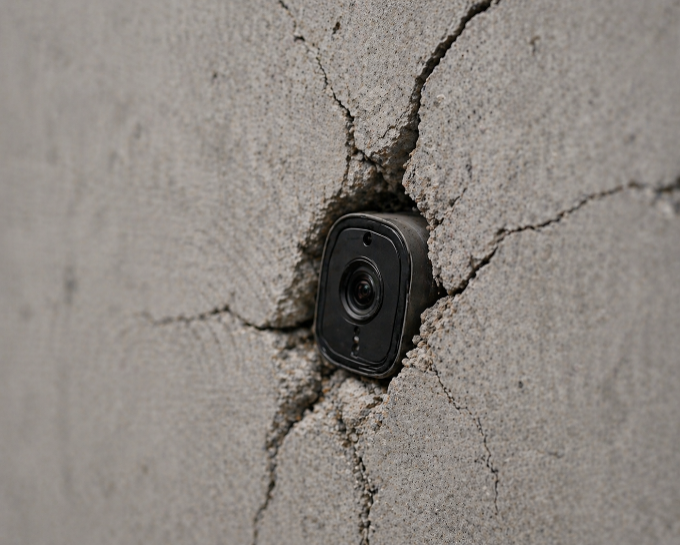
Concrete provides a strong, long-lasting mounting surface, but it requires the right tools and technique to ensure a secure, professional-grade installation.
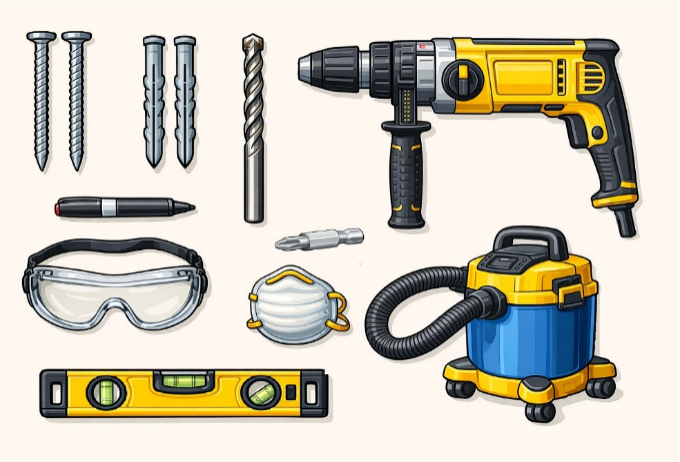
What You’ll Need
Step 1: Choose the Right Location
Before drilling, choose the placement carefully.
Look for:
Avoid:
Step 2: Mark the Drill Holes
Hold the camera mount against the concrete surface.
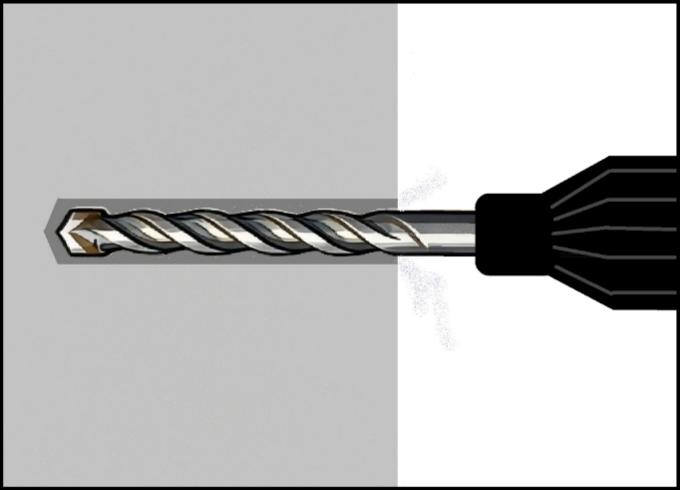
Step 3: Drill into Concrete
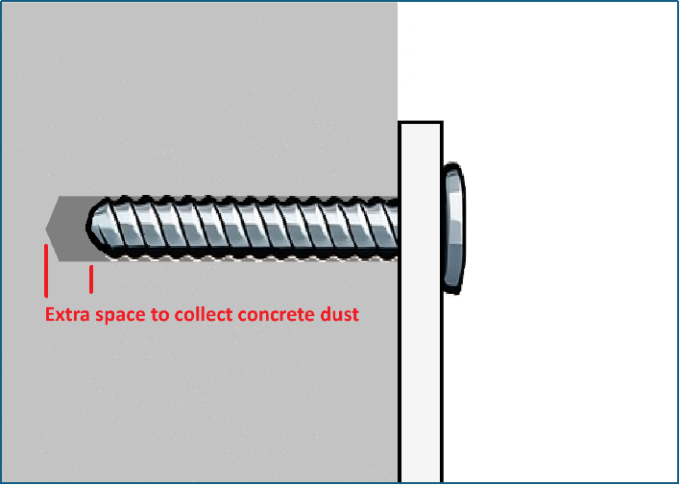
Before drilling, make sure you’ve chosen your fastener (anchors or concrete screws), as this determines the correct drill bit size.
Use a hammer drill with a masonry bit to drill into each marked point.
Avoid forcing the drill—let the hammer action do the work.
Step 4: Clean Out the Holes
Concrete drilling creates fine dust that can affect how well anchors hold.
Note: Wear a dust mask to avoid inhaling concrete dust.
Step 5: Attach the Mount
Place the mount over the holes and fasten based on your chosen option:
If using anchors:
If using concrete screws:
Note: Most hammer drills can switch to regular drill mode for driving screws. If yours cannot, it’s recommended to tighten screws with a regular power drill and driver bit or by hand with a screwdriver.
Step 6: Mount and Adjust the Camera
Attach the camera to the mount and double check its view in your app or monitor. If satisfied, confirm all screws are securely tightened.
Safety Tips
Common Mistakes to Avoid
These mistakes can cause loose anchors, reduced stability, or long-term failure.
To Wrap Up
Installing a security camera on concrete takes a bit more effort than softer materials, but it provides excellent durability and stability.
Focus on clean, accurate drilling and proper anchor installation, and you’ll have a setup that holds strong over time.
FAQs
Can you mount a security camera on concrete?
Yes, security cameras can be securely mounted on concrete, making it one of the most stable installation surfaces. For best results, use a hammer drill with a masonry bit, clean out any dust before inserting anchors, and drill slightly deeper than the screw length when using concrete screws to ensure a strong hold.
Will installing a security camera damage concrete?
When installed correctly, mounting a security camera will not damage the structural integrity of concrete. The installation typically leaves only a few small drill holes, which are minimal and generally do not affect the strength or durability of the surface.
Can you install a security camera on concrete without drilling?
In some cases, yes. On smooth surfaces like polished concrete, adhesive mounts may work as a no-drill option. To ensure a secure hold, thoroughly clean and dry the surface before applying the adhesive, and allow sufficient curing time before mounting the camera. However, drilling is still the most reliable method for long-term stability.
How to Mount a Security Camera on Vinyl Siding
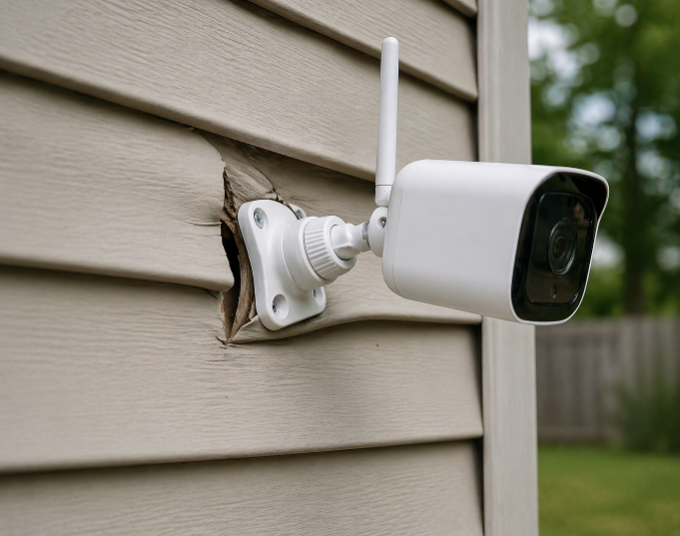
Vinyl siding isn’t structural, it’s a protective outer layer that can crack, warp, or loosen if you use the wrong mounting method.
This guide walks through the safest ways to install a security camera on vinyl siding — including when to drill, when not to, and how to avoid long-term damage.
Before You Start: Key Things to Know About Vinyl Siding
Vinyl siding:
That means you should never drill into the siding alone to support a camera mount.
Instead, you’ll either:
Best Ways to Install a Security Camera on Vinyl Siding
There are two main approaches depending on your situation.
Option 1 — Use a No-Drill Vinyl Siding Mount
This is the safest and easiest option.
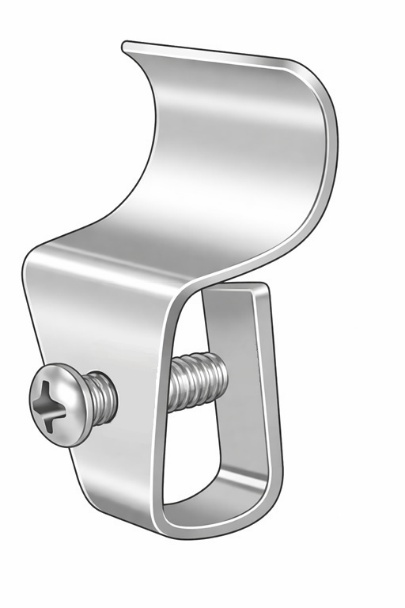
Vinyl siding mounts are designed to hook into the seam between siding panels to support lightweight devices like security cameras and avoid drilling entirely.
Advantages
Limitations
Usually the best option for:
Vinyl siding mounts come in many shapes and sizes to fit your specific siding, so they need to be purchased separately from your security camera. Detailed instructions for installing such mounts can be found with your chosen mount.
Option 2 — Drill Through the Siding into the Structure Behind
Vinyl siding covers sturdy structural parts of homes, which can be used for mounting.
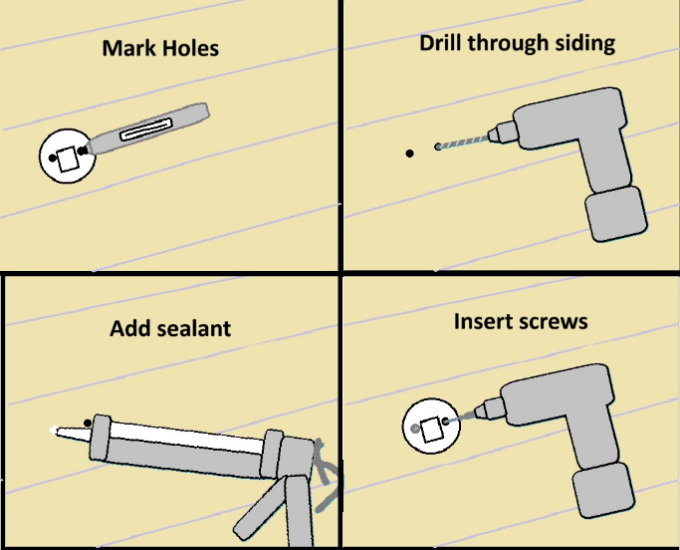
For a heavier duty, more permanent installation, you can drill through the siding and into the solid surface behind it, such as studs, framing, and wood sheathing. Here’s how:
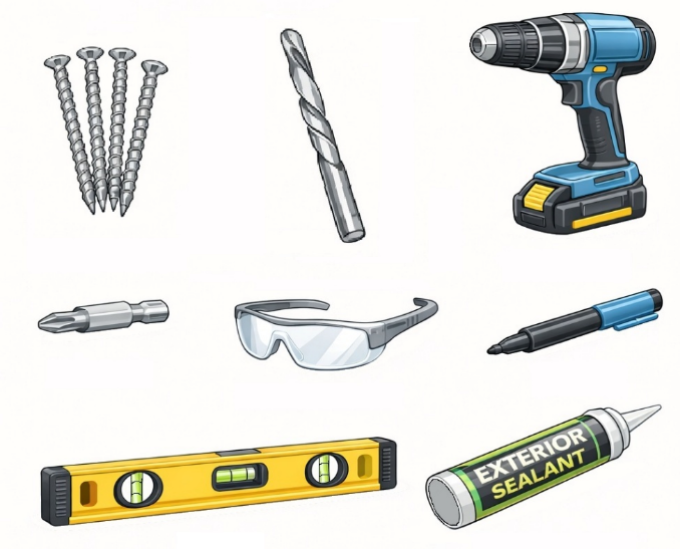
1. Gather the tools
Here are the basics tools needed for mounting a camera through vinyl into the structure behind.
Additional:
2. Choose location
Pick a spot that:
Note: Additional tools such as a stud finder or siding remover may be needed if you do not know what is behind your vinyl siding.
3. Mark holes
Hold the mount in place and mark the screw locations with a marker.
4. Drill carefully
Note: If the structure behind the vinyl is brick or concrete, additional steps of pre-drilling with a masonry bit and adding anchors are needed.
5. Seal the holes
Use exterior-grade sealant in the screw holes you just drilled into the vinyl.
Vinyl siding is made to move, expand, and contract while protecting your home from water damage. Properly sealing holes prevents water intrusion and long-term damage behind the siding.
6. Insert screws
Place the mount and screw the screws through the sealant and into the structure behind. Tighten until mount is secure, avoid overtightening.
Note: For additional weatherproofing, apply sealant around mounting bracket edges.
Common Mistakes to Avoid:
Drilling into siding only
Vinyl siding is not made to support weight on its own.
This leads to loose mounts, cracking, and long-term failure. It also exposes your home to additional water damage risk.
Skipping sealant
Even small holes can allow water behind the siding, which can cause mold, wood rot, and insulation damage.
Overtightening screws
Vinyl is made for slight movement.
If you overtighten or don’t leave additional space for flexible sealant in the vinyl entry points, siding can warp and panels can buckle over time.
Mounting in unsupported areas
Make sure you are drilling into something solid like studs or sheathing, not just insulation or empty space behind siding.
When to Avoid Drilling Altogether
You should strongly consider no-drill options if:
In addition to no-drill mounting options, you should check if there are parts of your home without vinyl siding you could drill into instead, such as pillars or roof decking.
To Wrap Up
Installing a security camera on vinyl siding is simple if you follow one rule:
Never rely on the siding itself for support.
Use a no-drill mount for convenience, or drill through to the structure behind the siding for a permanent solution.
Taking the time to install it correctly will help you avoid cracks, water damage, unstable mounting, and ensure your camera stays secure long-term.
FAQs
Will installing a security camera on vinyl siding ruin the siding?
Drilling into vinyl siding only and mounting the camera is likely to damage your siding and potentially cause more extensive damage to your home. Using a no-drill mount or correctly drilling into stable structure behind the siding can provide an alternative method that avoids damaging your home.
Is vinyl siding a good option for security camera installation?
Vinyl siding is not ideal for mounting anything as it is not made to hold weight on its own. Check if there are any acceptable mounting spots around your home that do not have vinyl siding or consider no-drill methods. If no other options are available, screwing the mount into stable structure behind vinyl siding can be a good solution when done correctly.
Do I need to hire a professional to install a camera on vinyl siding?
It is possible to install a camera mount on top of vinyl siding on your own, either with a vinyl siding mount or by drilling into the structure behind. However, these methods come with potential for damage and need to be handled with care. Hiring a professional may be worth the cost depending on your circumstances and level of expertise.